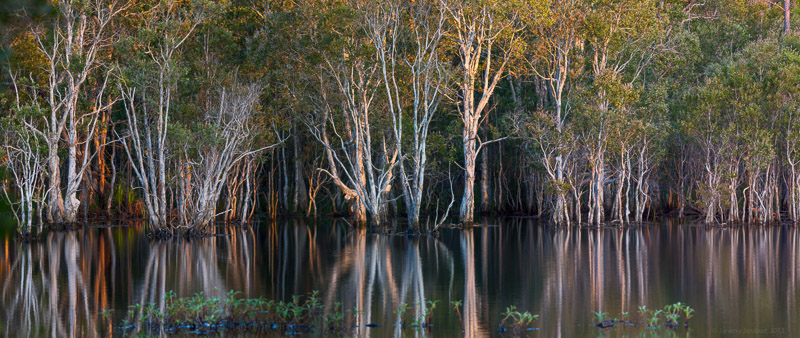
When we bought our rooms in The Wesley Medical Centre, the entry corridor and waiting area was a dark and uninviting space. Lauren, the architect who designed our fit-out did a great job of transforming them into a light, open and inviting space. Since then we have been looking for something to decorate the rather long, blank wall. I was originally planning a panoramic photo of the Milky Way arching over a landscape, but while out scouting for locations for this drove past Ewen Maddock Dam on the Sunshine Coast.


I had previously noticed the Melaleuca/paperbark trees lining the dam that reminded me of some photos of Aspens by Ansel Adams and John Sexton. I returned the next day and shot the frames needed to stitch together a panorama. Unfortunately though, the atmospheric conditions just above the water were quite unstable and the resulting images were not sharp enough to make a decent size enlargement from. A few weeks later I was able to get back there just before sunset to shoot the frames that comprise the image that now adorns the entry wall. These photos were literally taken seconds before the sun disappeared; as I finished them the scene turned a dull grey.
Post-processing
To create the finished panorama, I first made some basic adjustments in Adobe Lightroom. These included exposure and contrast, sharpening and lens correction. I then exported the seven frames to Photoshop where I merged them together into the panorama. Then back to Lightroom for some minor adjustments and the application of the Tonal Contrast filter in Nik Color Efex Pro 4.
Printing and hanging
I originally planned to print the panorama on paper and have it framed. There were several problems with this. The first issue was that we would be limited by the size of the glass available. We could have used acrylic instead, but I was not convinced it would look as good. The other problem was the price. Admittedly I was looking at some really nice Italian frame mouldings, but the quote came in at close to $8000! It was then that I started thinking about other ways I could achieve a sufficiently large ready-to-hang print for less than the price of a small car. I had heard of prints made on sheets of aluminium, which I thought would work well as it wouldn’t need to be framed. Unfortunately, after a web search and some phone calls, I couldn’t find anyone in Australia who could print it anywhere near as big as I wanted. I therefore contacted Bay Photo in California, USA. After having some small test prints made, I prepared the final image for submission to them. Although the native panorama was quite large, being 7 images stitched together, it was still only about half the final size I wanted. The maximum width offered by Bay Photo for an aluminium print is 96” or about 2.44m. I therefore enlarged the image to this size in Photoshop CC using the new “Preserve Details” interpolation method. Then I applied some final output sharpening based on the size of the image, expected viewing distance and type (continuous tone) and resolution (300dpi) of the printer. This was done with Nik Sharpener Pro 3.
Very nervously, I uploaded the final file and created the order. I chose the satin finish rather than high gloss as although the image looks better on high gloss, there would have been too many reflections from lights, windows, etc. where it is hanging. After a few very impatient weeks, the 65kg wooden crate arrived (the aluminium print itself only weighs 10kg). I met the courier driver outside the building and the two of us carried it inside. Fortunately the lifts are designed to accommodate hospital beds and it just fit inside, albeit with one end lifted towards the roof.

Once inside our rooms, I had to remove a large number of screws to open the crate. Fortunately I had my cordless drill with me! Inside the crate the picture was further protected by a layer of corrugated cardboard and then wrapped in brown paper. Once I had disassembled the crate and disposed of it with the help of Mick, the building manager, Pauline and I finally unwrapped the photo. I was immensely relieved to see that it had turned out as well as I had hoped.
